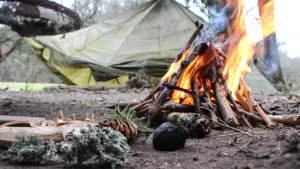

Building a campfire is an essential life skill that we can impart on our children in a way that is both rewarding and educational.
This hands-on experience (from our January Kindergarten Nature Study) not only introduces them to bushcraft skills but also provides a wonderful opportunity for learning and fun.
If you’d like to get the full guide for parents of January nature-based activities, click here.
Location for this activity: It’s best if you live near the woods and can walk to a forest but if not, find a nearby park or state forest that allows campfires. You can also forage for the dried wood in a state park and bring it home to build the campfire in your own backyard.
Here’s a list of state parks by state. Be sure to adhere to the rules and regulations for foraging wood and building campfires in your own state park which should be located on the state park website.
Foraging for Campfire Wood:
Campfire Safety First:
Wear gardening gloves or something similar to prevent splinters and injuries while foraging for wood. Be sure to teach your children about the poisonous plants in your area, dangerous insects or snakes they should look out for. If you feel there is a high risk for encountering something dangerous in your area, you can opt out of the foraging part of this activity and buy firewood instead.
Safety Question Prompts:
- Why do you think we wear safety goggles and gloves when handling wood?
- How can we ensure we’re safe from splinters and injuries while looking for wood?
Identifying Suitable Wood for a Campfire
Introduce kids to different types of wood suitable for campfires, such as dry twigs, dead branches, and fallen logs. Teach them to choose dry wood to ensure a more efficient and easier-to-light campfire.
Characteristics of Dry Wood vs Wet Wood:
Color:
- Dry wood: Typically has a lighter color than wet wood. Look for wood that appears more faded or grayish.
- Wet wood: Appears darker than dry wood. It may have a shiny or glossy appearance due to the moisture content.
Weight:
- Dry wood: Feels lighter when you pick it up.
- Wet wood: Feels heavier than dry wood. The water content in wet wood significantly increases its weight.
Sound:
- Dry wood: When two dry pieces of wood are knocked together, they produce a sharper, higher-pitched sound compared to wet wood.
- Wet wood: Produces a dull, thudding sound when knocked together. The water in the wood dampens the vibrations.
Cracks and Checks:
- Dry wood: Often has visible cracks or checks at the ends. These cracks indicate that the wood has dried and shrunk.
- Wet wood: Usually lacks the visible cracks or checks found in dry wood. Wet wood is more likely to have a smooth surface.
Bark:
- Dry wood: The bark is more likely to be loose or peeling away from the wood. This is because as wood dries, the bark tends to detach.
- Wet wood: The bark tends to adhere tightly to the wood. Wet wood often has a more intact and attached bark.
Texture:
- Dry wood: Feels rough and porous. Dry wood absorbs moisture less readily than wet wood.
- Wet wood: Feels smooth and less porous. The moisture content gives wet wood a denser and smoother texture.
Wood Identification Question Prompts for Kids:
- What do you notice about the weight of this piece of wood? Does it feel heavy or light?
- How does the wood feel in your hands? Is it smooth, rough, or somewhere in between?
- Take a close look at the color of the wood. Can you describe it? Does it look light or dark?
- Check out the bark on this piece of wood. Is it tightly attached, or is it loose and peeling?
- Listen carefully when we tap these two pieces of wood together. What kind of sound do they make?
Respecting Nature While Foraging for Wood
Instill the value of leaving no trace by teaching kids to forage responsibly and only take what is necessary. Discuss the importance of preserving the environment and not harming living trees.
Building a Campfire
Choosing the Right Spot for Building a Campfire
- Find a safe and open space away from overhanging branches or dry grass.
- Clear the area of any debris, leaves, or flammable materials.
Arranging the Wood:
- Teach kids the teepee or log cabin method for building a campfire. In this tutorial, we will be using the teepee method.
Building a Campfire with the Teepee Method

It’s called the “teepee” method because the wood is arranged in a conical shape, resembling a teepee or tent.
Step 1: Gather Your Materials:
- Collect dry twigs, small sticks, and leaves to use as kindling. You’ll also need larger pieces of wood for fuel.
Step 2: Clear the Area:
- Choose a safe spot for building a campfire, away from overhanging branches or dry grass. Clear the area of any debris or flammable materials.
Step 3: Create a Small Pile:
- Begin by placing a small pile of dry leaves or other easily ignitable materials in the center of your chosen spot.
Step 4: Arrange the Kindling:
- Surround the pile of leaves with a circle of small twigs or sticks, leaning against each other to form a cone or teepee shape. This creates a framework for the fire to catch.
Step 5: Gradually Add Larger Sticks:
- As the kindling catches fire, gradually add larger sticks to the structure, leaning them against the smaller twigs. Continue to build the teepee by adding progressively larger sticks.
Step 6: Add Fuel Wood:
- Once the fire is well-established with the smaller sticks, you can add larger fuel wood, such as logs, to keep the fire burning. Place these logs against the outer layer of the teepee.
Step 7: Maintain Airflow:
- Ensure there is enough space between the pieces of wood to allow airflow. Proper ventilation is essential for a good, steady burn.
Step 8: Monitor the Fire:
- Keep an eye on the fire and add more fuel wood as needed. Be cautious not to smother the flames by adding too much wood too quickly.
- Emphasize the importance of proper ventilation to allow oxygen to reach the fire.
Question Prompts for the Teepee Method of Building a Campfire:
- Why is it important to leave spaces between the sticks? What happens if we don’t allow enough air to reach the fire?
- Why do we start with smaller sticks before adding larger logs?
- What colors do you see in the flames? Why do you think flames have different colors?
- Why is it important for an adult to supervise when we’re building a campfire? What could happen if we don’t have supervision?
- Why do we clear the area around the campfire spot?
Remember to tailor the questions to the child’s age and level of understanding, allowing them to explore and learn in a way that’s engaging and enjoyable.
BONUS: Campfire Activities:
Storytelling:
- Gather around the campfire and take turns telling stories or creating imaginative tales. One of my kid’s favorite games is “Finish the Story” where each child adds a sentence onto the story of the previous. Be ready for lots of laughter at what becomes a ridiculous story.
- Encourage creativity by asking open-ended questions.
Nature Scavenger Hunt:
- Before starting the fire, go on a scavenger hunt to find interesting items in nature.
- Discuss and learn about the different elements found.
Cooking Treats:
- Roast marshmallows or make simple campfire recipes like foil packet meals.
- Teach basic cooking skills and fire safety while enjoying delicious snacks.
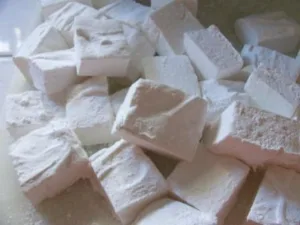
Here’s an organic homemade marshmallow recipe you can make ahead of time.
Fire Safety Precautions:
Keep a Water Source Nearby:
- Always have a bucket of water or a hose nearby for emergencies.
- Teach kids how to use water to extinguish the fire safely.
Supervision:
- Stress the importance of adult supervision at all times.
- Remind kids never to play with fire or approach the campfire without permission.
Extinguishing the Fire:
- Demonstrate how to properly extinguish a campfire by pouring water over the embers.
- Ensure the fire is completely out before leaving the area.
Teaching your kindergartener to forage for wood and build a campfire is a rewarding experience that combines outdoor education, practical skills, and a love for nature. With a focus on safety, responsibility, and creativity, these activities can become cherished memories and valuable lessons for a lifetime.
What is the Kindergarten Nature Study?
The Wild Schooler releases monthly nature-based curriculum that follows the seasons of the year and helps you to build a strong connection between your kindergartener and nature. We provide you with a parent guide of over 40+ indoor and outdoor engaging activities (complete with material lists) that help to build skills around STEAM, bushcraft, homesteading and homemaking, making it easy for you to wild school your homeschooler!
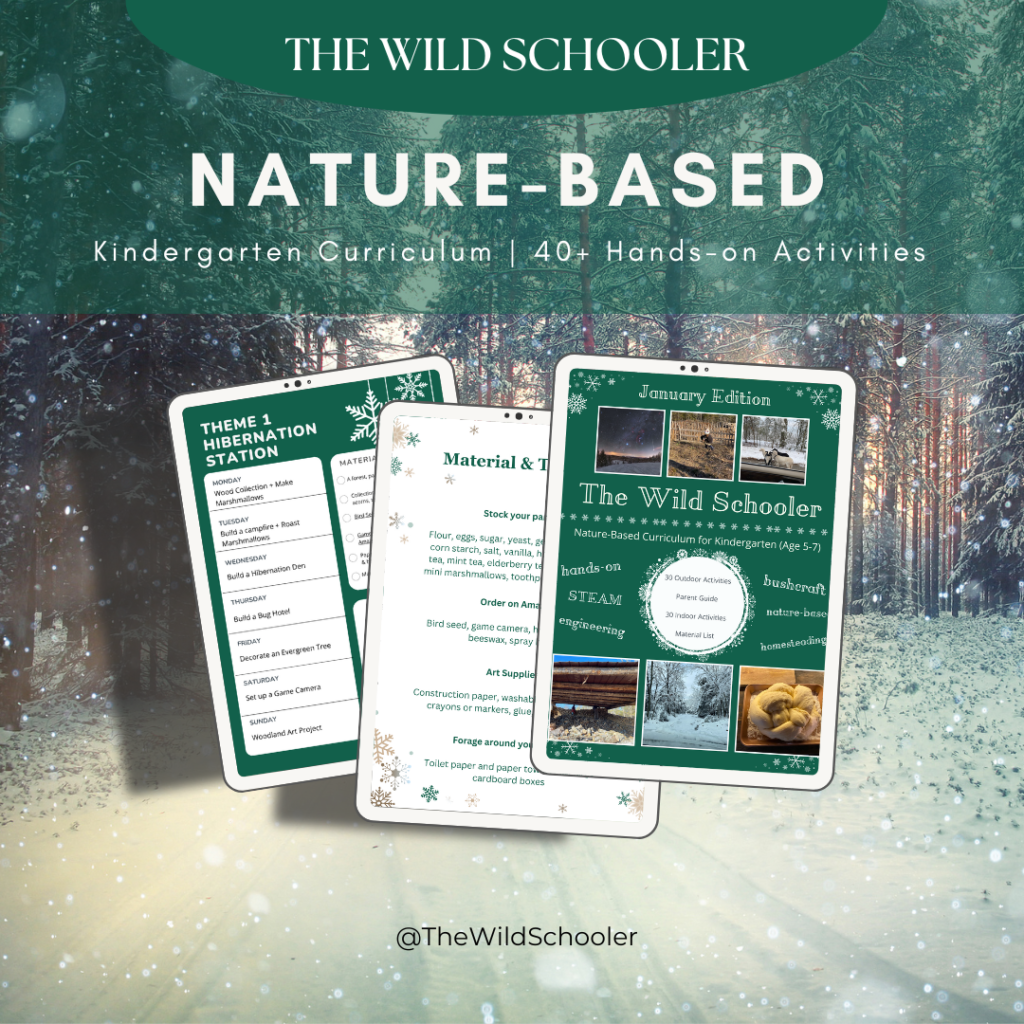
It’s free for the first month (then just $7) so download the parent guide of nature-based activities if you want to try it out.